
Drywall Painting & Finishing in Mount Dora. FL | Smooth Walls & Skilled Finishes
The gap between hung drywall. A finished room is where most of the visible quality lives. Board goes up quickly and looks rough for a while. Then finishing decides whether the walls read as flat. Deliberate or as a series of joints. Fastener lines you notice every evening when the lamps come on. Mount Dora Drywall Proshandles drywall finishing and painting for homes and commercial buildings across Mount Dora. Lake County, taking surfaces from freshly hung board through taping. Coating, sanding, priming, and topcoat. It is the stage most people care about. The one that gets rushed most often.
Finishing is also where the biggest misunderstanding sits. Paint does not hide a poor finish, it advertises it. Glossier sheens, wide windows, and modern downlighting all push light across a wall at exactly the angle that reveals ridges. Sanding scratches, and unprimed compound. That is why the finish level gets decided before the first coat of mud. Not after the painter arrives. Why priming the surface properly matters as much as the topcoat that goes over it. If you want walls that hold up under real light, request a quote. We will talk about the finish level your rooms actually need rather than defaulting to whatever is quickest.
Get a FREE Quote.
Why Choose Mount Dora Drywall Pros for Finishing and Painting
Having the same company finish. Paint removes the most common argument on a job site. When finishing and painting are split between two trades. Imperfections that appear under the topcoat turn into a discussion about whose problem they are. The homeowner is left in the middle. Mount Dora Drywall Pros carries that responsibility in one place. If a joint shows once the paint is on. It is ours to fix. We would rather catch it at the sanding stage than argue about it later.
We work to a defined finish level rather than an assumption. We check surfaces under raking light before priming instead of after. Primer is treated as a real coat with a real purpose. Not a formality, because unsealed compound. Painted board absorb differently and that difference shows as flashing in the final finish. On the painting side we cut in properly, keep edges clean. Protect floors, fixtures, and trim across. You get a clear scope covering finish level. Primer, number of topcoats. What is excluded, so nothing is vague. Check availability and we will walk you through the options for your space.

Our Drywall Finishing and Painting Services
Finishing covers a range of outcomes rather than a single standard. The right one depends on lighting, sheen. How the room will be used. A garage and a great room with floor-to-ceiling windows do not need the same level of preparation. Below are the finishing and painting services we handle most often around Mount Dora.
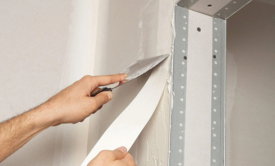
Taping and Joint Compounding
Bedding tape into seamsand building joints up in coats so the surface reads flat rather than showing every board edge.
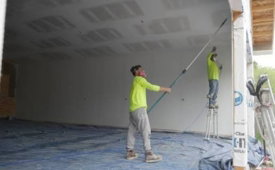
Level 4 and Level 5 Finishing
Finishing new board to the appropriate industry level, including full skim coating where lighting and sheen demand it.
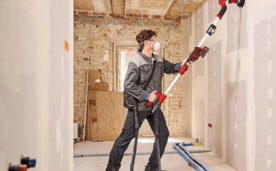
Sanding and Surface Preparation
Sanding joints, fastener points, and corners smooth. Then checking the whole surface under raking light before priming.
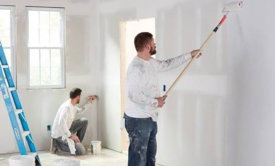
Drywall Priming and Sealing
Applying the right primer so compound and board absorb evenly. The topcoat does not flash across patched areas.
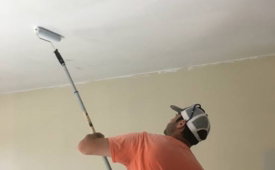
Interior Wall and Ceiling Painting
Applying finish coats to walls. Ceilings with clean cut lines at trim. Corners, and ceiling junctions.
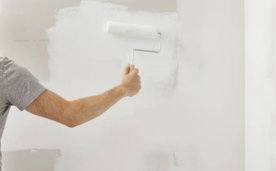
Repaint and Surface Refresh Preparation
Preparing previously painted walls by filling, sanding. Spot-priming before repainting an existing room.
Choosing the Right Finish Level for Your Space
The single most useful decision you can make before finishing starts is what level of finish each area actually needs. That is driven by three things: how much natural light crosses the wall. What sheen of paint is going on. How close people stand to it. A hallway with flat paint and no direct window light forgives a lot. A great room with tall windows. A stairwell wall lit from the side. Any surface taking an eggshell or satin sheen shows everything. Those areas justify a higher finish level with a skim coat over the full surface. Getting this decided early is cheaper than upgrading halfway through. Because a skim coat applied after the fact means re-sanding. Re-priming work you have already paid for.
Conditions in the building matter just as much. Joint compound needs stable temperature and airflow to cure evenly. Florida humidity slows that down considerably. Particularly in a house that is not yet conditioned. Coats applied onto compound that has not fully dried shrink and crack later. We want the air conditioning running and the property dried in before finishing begins. Dust control is the other planning point. Since sanding produces fine dust that travels easily. Settles on everything, so occupied properties need containment and commercial buildings need HVAC returns isolated. Trim, flooring, cabinetry, and fixtures all get protected before the first coat rather than once the mess starts.
Light, Humidity, and Finishing in Mount Dora Homes
Local building styles put real pressure on finish quality. Open plans, tall great rooms. Large window walls are common in the newer subdivisions around Mount Dora. All three flood interior surfaces with low-angle light for much of the day. Sliding doors onto lanais do the same thing. Those rooms show finishing flaws that would be invisible in a compact, low-light space. Is why we recommend a higher finish level in them rather than treating every wall in the house identically. Older homes near the town center have the opposite issue, withexisting textures, layered paint, and walls that are no longer perfectly flat. Preparation there focuses on blending rather than achieving a uniform modern flatness.
The climate shapes the schedule more than the method. The long humid season slows compound curing. A property without air conditioning running can add days to a finishing program. Unconditioned areas such as garages, enclosed lanais. Back-of-house commercial spaces swing between hot and humid. Affects both curing and long-term paint performance, so primer. Paint selection matter more in those rooms. Afternoon storms through the wet season can also raise indoor humidity sharply. Is another reason we prefer to control the environment rather than work around it. Hope the coats dry on schedule. We prime and paint new and older homes in Winter Garden and Howey-in-the-Hills.
What Determines the Cost of Finishing and Painting
Finish level is the largest single factor. The jump from a standard level to a full skim-coated surface is significant because it involves coating the entire wall rather than just the joints, then sanding. Priming all of it. Surface area drives the rest. Ceilings cost more per square foot than walls because overhead coating and sanding are slower. Height adds cost wherever staging or lifts are required. Rooms broken into small spaces with many corners, openings. Returns take longer per square foot than large open areas.
On the painting side, the variables are coats. Colors, and cut lines. Deep or heavily pigmented colors often need an extra coat. Switching from a dark existing color to a light one takes more coverage. Rooms with extensive trim, built-ins, ceiling detail. Multiple colors require more cutting in. Is hand work and cannot be sped up. Whether existing surfaces need repair or spot-priming first. Whether furniture needs moving and protecting. How much containment the property requires all feed into the figure. We quote finish level and paint scope separately so you can see the cost of an upgrade rather than guessing. Request a quote and we will set out the options.
Our Finishing and Painting Process
Step 1: Surface Review and Finish Level Discussion
We look at the space. Note where light crosses the walls. Discuss the paint sheen you plan to use. From that we recommend a finish level per area rather than applying one standard across the whole property.
Step 2: Written Scope and Paint Specification
Your quote sets out the finish level for each area. The primer being used, the number of topcoats, what is protected. What falls outside the scope. Nothing starts until you have approved it.
Step 3: Protection and Environment Setup
Floors, trim, cabinetry, and fixtures are covered. Containment goes up where the building is occupied. We confirm the space is conditioned so compound will cure evenly rather than drying unevenly.
Step 4: Taping and Joint Bedding
Tape is bedded into every seam and internal corner. Corner bead is coated at external angles. Fastener points get their first pass at this stage so nothing is missed later.
Step 5: Filling Coats and Feathering
Successive coats are applied and feathered progressively wider. With proper drying time between each one. Rushing this stage is what causes shrinkage cracks and visible ridges months later.
Step 6: Skim Coating Where Specified
Where a higher finish level has been agreed. A skim coat is applied across the full surface so the entire wall shares one consistent texture. Porosity rather than just the joints.
Step 7: Sanding and Raking Light Inspection
Surfaces are sanded smooth and then checked under raking light from multiple angles. Anything that shows gets addressed before primer. Because primer will not hide it. Paint will highlight it.
Step 8: Priming, Painting, and Final Walkthrough
The surface is primed to even out absorption. Topcoats are applied with clean cut lines at trim. Ceilings, protection is removed, and we walk the rooms with you under the lighting you actually use.
Drywall Finishing and Painting FAQs in Mount Dora
Level 4 means joints, corners, and fastener points are coated. Sanded, with the board face between them left as-is. Level 5 adds a skim coat across the entire surface so the whole wall has the same texture and porosity. The practical difference appears under light and sheen. With flat paint in an average room. Level 4 usually looks fine. Under strong side light, in a room with large windows. With a satin or semi-gloss paint. The difference in absorption between coated joints. Bare board face becomes visible. Level 5 is worth the extra cost.
Yes, and skipping it is the most common reason new walls look patchy. Joint compound and the paper face of drywall absorb paint at very different rates. Applying color directly over an unprimed surface leaves the joints reading as duller or shinier patches. A effect called flashing. A drywall primer evens out that absorption so the topcoat sits uniformly across the whole wall. It also improves coverage, which often means fewer coats of the more expensive finish paint.
We can, and it is common. Textured surfaces take more paint than flat ones because of the increased surface area. They need a roller nap suited to the depth of the texture so the paint reaches into the pattern rather than bridging over it. We inspect the existing texture first for loose or damaged areas, repair those. Spot-prime the repairs so they do not show through. If you would rather remove the texture. Go flat instead, that is a different scope and we can quote it separately. On ceilings, popcorn ceiling removalbefore painting gives a flatter surface that is far easier to keep clean.
Finishing usually runs several days because each coat of compound needs to dry fully before the next goes on. Three coats is typical on new work. More where a skim coat is specified. Each one needs its own drying window. Humidity here extends that, especially without air conditioning running in the property. Sanding and priming follow, then paint. We give you a realistic schedule rather than compressing the coats. Because forcing them is what produces shrinkage cracks. Joints that reappear a few months down the track.
Sanding produces the finest dust of any stage of the work. It travels easily. We manage it by sealing the work area, protecting floors, trim. Fixtures, isolating HVAC returns so dust does not circulate through the building. Cleaning at the end of each visit rather than at the end of the job. Some fine dust in the immediate work zone is unavoidable. With proper containment it should not spread into rooms we are not working in.
Yes, and it is a regular part of our work. We inspect the hung board first. Checking fastener depth, board gaps. Whether edges are properly supported. We tell you what we find before quoting. Poorly hung board takes longer to finish. There are limits to what compound can correct. Being upfront about the starting condition protects both of us. Once we have agreed the scope. We take the surface through taping, coating, sanding. Priming to the finish level you have chosen.
Get a Clear Quote on Your Project
The next step is a straight conversation about the space itself. Tell us what you are dealing with. Send through photos or plans if you have them. We will let you know what the work involves. How long it should take. What it will cost. There is no obligation attached to an estimate. We would rather spend the time getting the scope right than hand you a number that changes halfway through the job.
Mount Dora Drywall Pros works with homeowners, builders, property managers. Business owners across Mount Dora and the surrounding Lake County area. Request a quote or check availability. You will get a clear answer on timing rather than a vague callback promise. If your schedule is tight or you are coordinating around other trades, tell us upfront. We will plan the work around it.